
Single speed gear ratio determines how hard your bike feels to pedal and how far it travels with each pedal revolution. Choosing the right gearing means balancing acceleration, comfortable cadence, terrain and the speed you want to maintain.
Table of Contents
What is a single-speed gear ratio?
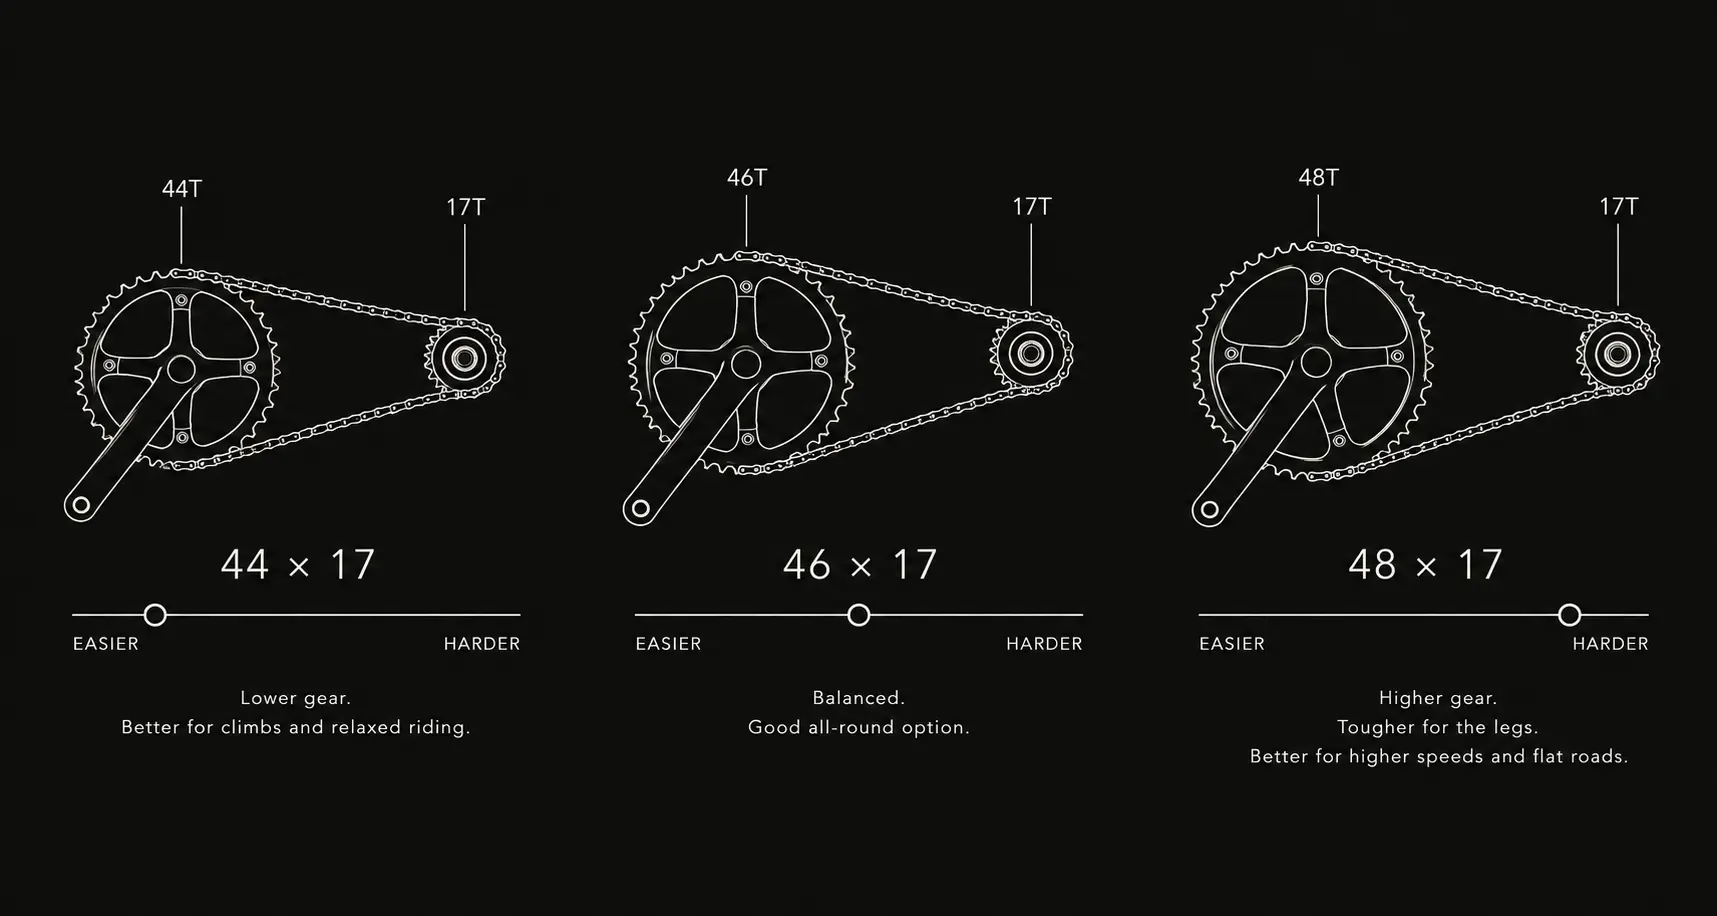
A single speed gear ratio compares the number of teeth on the front chainring with the number on the rear freewheel. Divide the front tooth count by the rear tooth count:
Gear ratio = chainring teeth / freewheel teeth
A 46-tooth chainring with a 17-tooth freewheel gives 46 / 17 = approximately 2.71. In simple terms, the rear sprocket and wheel turn about 2.71 times for each complete turn of the cranks. This number makes it easy to compare combinations before considering wheel size.
Compare common chainring and freewheel combinations
| Combination | Ratio | General character |
|---|---|---|
| 44 × 17 | 2.59 | Easier starts and a more relaxed city direction |
| 46 × 17 | 2.71 | Balanced starting point for mixed flat riding |
| 48 × 17 | 2.82 | Taller feel for stronger riders and open roads |
| 46 × 18 | 2.56 | Easier than 46 × 17 |
| 46 × 16 | 2.88 | Harder than 46 × 17 |
These single speed gear ratio examples are directions, not promises. The same ratio can feel manageable to one rider and heavy to another. Fitness, fatigue, headwind, cargo, stop frequency and gradient all change the experience. Use the table to understand the relationship between tooth counts, then judge it against your own route.
What makes a gear taller or easier?
A larger front chainring raises the ratio when the rear freewheel stays the same. A smaller rear freewheel does the same. The result is commonly called a taller or harder gear: the bicycle travels farther per crank revolution, but accelerating and climbing require more force.
A smaller front chainring or larger rear freewheel lowers the ratio. This makes starts and inclines easier and supports a higher cadence at a given road speed. The trade-off is that you may reach an uncomfortably high cadence sooner when riding fast or descending.
- To make the gear easier: reduce chainring teeth or increase freewheel teeth.
- To make the gear taller: increase chainring teeth or reduce freewheel teeth.
- To make a small adjustment: change one component by a modest tooth count and test it before making another change.
Ratio alone does not show road speed
A single speed gear ratio does not include the rolling circumference of the wheel and tire. A larger effective wheel diameter travels farther with each wheel revolution than a smaller one. That means two bikes with the same 46 × 17 gearing can produce slightly different development if their wheel or tire sizes differ.
More detailed comparisons use gear inches, metres of development or speed at a chosen cadence. These measures combine the drivetrain ratio with wheel size. Sheldon Brown’s established bicycle gear calculator is useful when you want to compare complete setups rather than tooth counts alone.
Start with terrain
Terrain sets a practical limit for your single speed gear ratio. Flat routes give you more freedom to choose a taller gear because long climbs are not setting the limit. Rolling terrain usually benefits from a moderate ratio that can still be pushed comfortably over short rises. Frequent or steep climbing calls for caution: gearing selected only for flat-road speed can become exhausting when there is no lower gear available.
Consider the entire regular route, not its average. A commute that is mostly flat but contains one repeated steep bridge may need an easier ratio than the map initially suggests. Headwind also behaves like a gradient because it increases the force needed to maintain speed.
Count starts as well as hills
Traffic lights, junctions and tight corners repeatedly bring cadence back to zero. A tall single speed gear ratio that feels smooth once moving can feel demanding during every restart. This is why city riders should count stops, not only elevation.
Cargo increases the effect. A backpack, loaded rack or child seat adds mass that has to be accelerated. If practical commuting is the goal, an easy, repeatable start can be more valuable than a theoretical increase in top speed.
Use cadence to judge the result
Cadence is how quickly the cranks turn, measured in revolutions per minute. Your single speed gear ratio determines the road speed at a given cadence, while your preferred cadence helps determine which ratio feels comfortable. A taller ratio produces more road speed at the same cadence, while a lower ratio requires faster pedalling to match that speed.
Do not select gearing around the fastest speed you might briefly reach. Think about the cadence you can maintain for most of the ride without grinding a heavy gear or bouncing because the pedals are turning too quickly. Shimano’s gearing explanations also treat cadence control and terrain range as connected decisions, even though multi-gear systems provide more ratios than a single-speed bicycle.
Change the chainring or the freewheel?
Either component changes the ratio, but the practical cost and available sizes may make one route easier. Threaded single-speed freewheels are commonly offered across a limited set of tooth counts. Chainrings must match the crank’s bolt-circle diameter, bolt pattern, mounting position and chain width.
Changing the rear freewheel by one tooth often produces a noticeable step because the rear number is relatively small. Moving from 17 teeth to 16 changes a 46-tooth setup from about 2.71 to 2.88, an increase of roughly six percent. Moving from a 46-tooth to a 48-tooth chainring with the same 17-tooth freewheel raises the ratio by about four percent.
Park Tool’s freewheel installation guide shows why the correct removal tool and hub interface must be confirmed before treating a freewheel swap as a quick adjustment.
Check chain length and adjustment range
A different tooth count changes the chain path and may require a chain-length or axle-position adjustment. Frames with horizontal or sliding dropouts allow the rear wheel to move so the chain can be tensioned. That adjustment range is finite, so a large gearing change can require adding or removing chain links.
Chain tension should be checked through a full crank rotation because chainrings and sprockets are not perfectly concentric. The tightest point should remain safe without binding. If the chain is too loose, it can derail; if it is excessively tight, it can run roughly and load the bearings.
Keep chainline and component width compatible
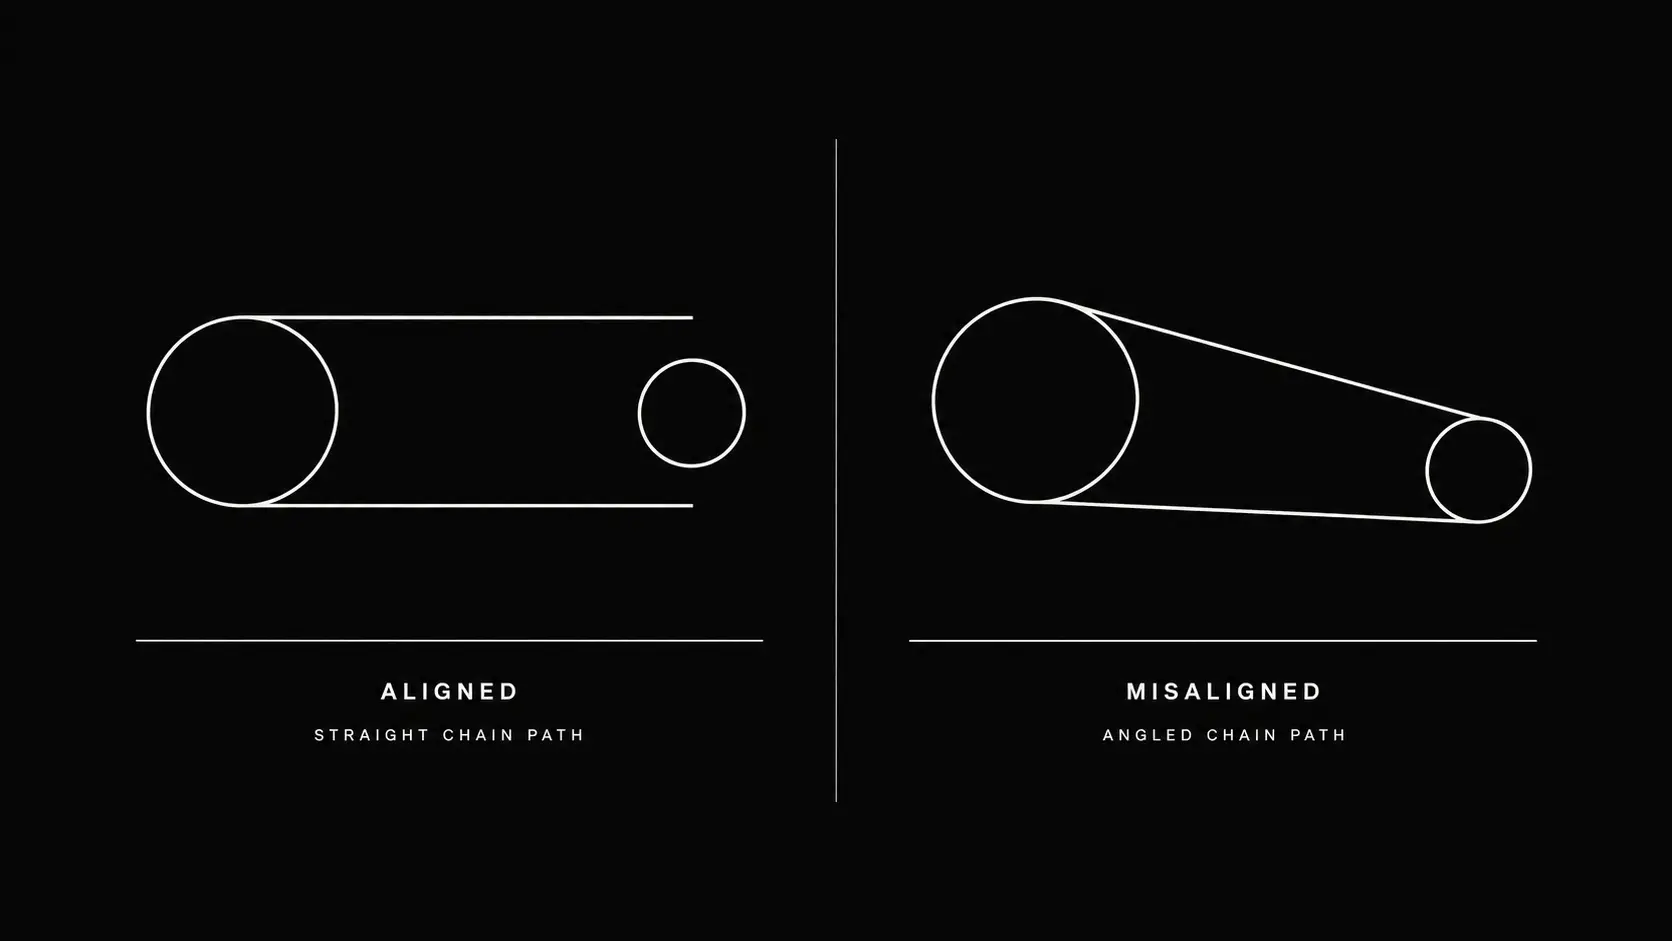
A useful ratio is not enough if the drivetrain runs at an angle. The chainring and freewheel should be appropriately aligned when viewed from above. Crank design, bottom bracket spindle, chainring position, hub spacing and freewheel position all influence chainline.
Chain width matters too. Components built around 1/8-inch track or BMX dimensions do not automatically combine with 3/32-inch road-derived parts. Check the chainring, freewheel and chain specifications as a group. Surly’s single-speed drivetrain reference covers chainline, tension and compatible one-speed setup.
A practical selection process
- Describe the route: note gradients, traffic stops, surfaces, prevailing wind and carried load.
- Choose a conservative starting ratio: prioritise repeatable starts and manageable climbs over maximum speed.
- Confirm compatibility: verify crank, chainring, freewheel, chain, hub and frame adjustment range.
- Test on the real route: ride in both directions and include the hardest regular climb.
- Change one variable: adjust the front or rear tooth count, then compare again.
This method produces better information than copying another rider’s setup. Their route, cadence, strength, wheel size and priorities may be different from yours.
Good starting directions, not universal answers
For a 700c urban build, a single speed gear ratio based on 44 × 17, 46 × 17 or 48 × 17 illustrates a useful progression from easier to taller. These are examples for comparison, not guaranteed recommendations. A hilly commute may justify a larger rear freewheel, while a fit rider on open flat roads may prefer a taller combination.
Bike Builder uses riding purpose, surface, comfort-versus-speed priority and rider information to suggest a starting point. Use the recommendation as a hypothesis to test, not a rule. You can generate your single-speed build, compare it with this guide and refine the gearing before buying components. For the rest of the bicycle, continue with the complete beginner’s build guide.