
Single speed chain tension is important because the chain has to transfer your pedalling force from the chainring to the rear sprocket without a derailleur taking up the slack. If the chain is too loose, it can rattle or derail. If it is too tight, it can bind, run noisily and place unnecessary load on the bearings.
The useful answer is not “as tight as possible.” A correctly adjusted chain has a small, controlled amount of movement at the tightest point in the drivetrain, while the cranks and rear wheel still turn freely. This guide explains how to find that point and adjust horizontal or vertical dropouts.
It also covers problems that tension alone cannot fix.
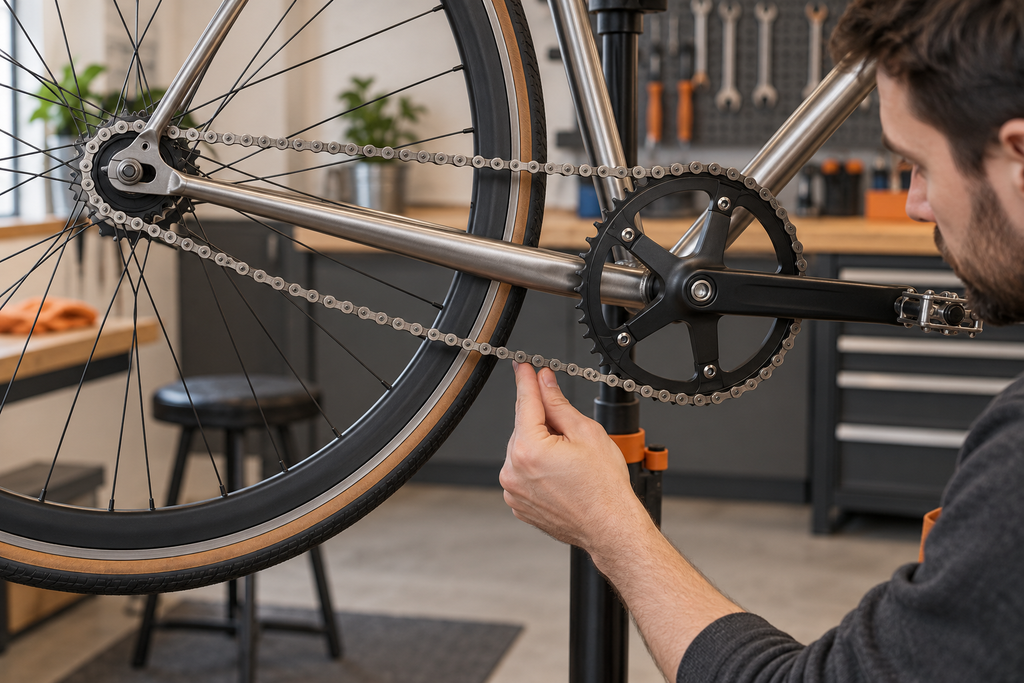
Table of Contents
Quick answer: how tight should a single-speed chain be?
To check single speed chain tension, support the bike and press the chain up and down halfway between the front chainring and rear sprocket. Park Tool’s single-speed chain procedure uses approximately 1/2 inch, or about 12 mm, of total movement as a general starting point. If the chain has a noticeable tight spot as the cranks turn, its procedure advises setting about 1/4 inch, or 6 mm, of movement at that tightest point.
Treat those numbers as workshop guidance, not a replacement for the instructions supplied with your frame, hub, chain, or tensioning system. The final checks matter just as much: the wheel must remain centred, the chain must stay engaged under a gentle sideways test, and the drivetrain must rotate without binding.
In plain language: the chain should not hang loose, but it should never feel like a guitar string. Check it through a complete crank rotation before tightening the rear axle.
Why single speed chain tension matters
A derailleur has a spring-loaded cage that manages changes in chain length and keeps the lower run under tension. A conventional single-speed drivetrain has no such mechanism. The distance between the bottom bracket and rear axle therefore determines how much slack is left in the chain.
That is why dropout design is central to a single-speed build. Horizontal or sliding dropouts let the rear axle move fore and aft. An eccentric bottom bracket changes the crank axle position. Some eccentric hubs alter the effective axle position. A vertical-dropout frame normally needs a compatible chain tensioner or another purpose-built solution.
If you are still choosing a frame, read our single-speed frame fit and compatibility guide before buying the wheel or crankset. The easiest time to solve chain-tension compatibility is before the components arrive.
Find the tight spot before you adjust anything
Chainrings and sprockets are not always perfectly concentric with their mounting points. Small manufacturing tolerances, uneven bolt seating, or a slightly worn component can make the chain tighter at one crank position than another. If you set tension at the loosest position, the chain may bind half a turn later. Correct single speed chain tension should leave a small amount of controlled movement without allowing the chain to sag.
- Support the bike securely so the cranks and rear wheel can turn.
- Rotate the cranks slowly through one complete revolution.
- Stop every quarter turn and check movement at the midpoint of the chain.
- Identify the position where the chain has the least movement.
- Make your final adjustment at that tightest position.
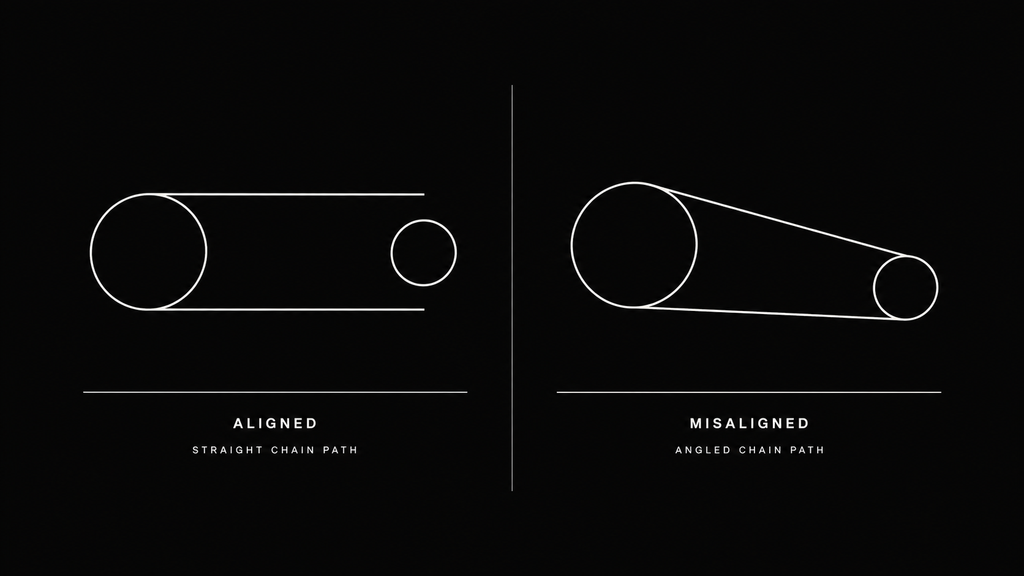
Also watch the chain from behind. It should run straight from the chainring to the rear sprocket without wandering sideways. Tension cannot correct poor chainline, a bent chainring, a stiff link, or damaged teeth.
How to adjust chain tension with horizontal dropouts
Horizontal dropouts make single speed chain tension easier to adjust because they let you change the axle position in small increments. You will usually need the correct wrench for the axle nuts and, ideally, a torque wrench for final tightening.
- Loosen both axle nuts. Loosen them only enough for the wheel to move in the dropout. If the bike has a coaster brake, make sure its reaction arm is handled according to the hub manufacturer’s instructions.
- Move the wheel evenly. Pulling the axle backwards adds tension. Moving it forwards reduces tension. Work in small increments on alternating sides.
- Centre the wheel. Check its position between the chainstays and seatstays. A straight wheel matters for tyre clearance and rim-brake alignment.
- Snug the axle nuts. Tighten them enough to hold the wheel while you turn the cranks and find the tight spot again.
- Recheck movement. Adjust until the chain has controlled movement at the tightest point and rotates freely.
- Tighten to specification. Use the axle or hub manufacturer’s torque value. Recheck wheel alignment and chain tension afterwards, since tightening can move the axle slightly.
A chain tug can make fine adjustment easier and help resist axle movement under pedal load. It does not replace properly tightened axle hardware. Use a model compatible with your dropout and axle dimensions.
What if your frame has vertical dropouts?
With vertical dropouts, the rear axle sits in one fixed position, so you cannot set single speed chain tension by sliding the wheel backwards. A spring-loaded tensioner mounted at the derailleur hanger is a common solution for a freewheel single-speed conversion. Surly’s Singleator, for example, is designed to manage excess slack on vertical-dropout single-speed drivetrains.
A spring-loaded tensioner must not be treated as a universal fix. Surly explicitly says its Singleator is not for fixed-gear or coaster-brake drivetrains. Those systems can apply chain force in both directions or rely on a reaction mechanism that a spring tensioner is not designed to manage. For those builds, use a frame, eccentric bottom bracket, eccentric hub, or other tensioning method approved for the exact drivetrain.
You may hear about a “magic gear,” a chainring and sprocket combination that happens to fit a fixed axle distance. It can work temporarily, but chain wear changes effective length and component tolerances vary. It is not as adjustable or dependable as a purpose-built tensioning system.
Signs your chain is too loose
- The lower chain run visibly sags.
- The chain slaps the chainstay over bumps.
- You hear repeated rattling when accelerating or riding on rough surfaces.
- The chain can be pushed sideways off the chainring or sprocket too easily.
- The chain has already derailed.
Do not keep riding after a derailment without finding the cause. Refit the chain, inspect it for twisted links or damage, check chainline and tooth condition, then set the tension again. If the rear axle repeatedly slides forwards, inspect the axle nuts, washers, dropout faces, and any chain tug rather than simply pulling the chain tighter.
Signs your chain is too tight
- The cranks feel resistant or notchy when turned by hand.
- The drivetrain produces a constant hum, whine, or grinding sound.
- There is almost no vertical movement in the chain at its tightest point.
- The chain alternates between acceptable tension and severe binding as the cranks turn.
- Rear hub or bottom bracket bearings develop play or roughness prematurely.
Excess single speed chain tension does not make a build safer. It increases load on the chain, rear hub bearings, and bottom bracket bearings. If the drivetrain binds at one position, reduce tension and inspect component concentricity rather than forcing the axle farther back.
Chain wear is different from chain tension
Moving the rear wheel backwards can remove visible slack, but it cannot reverse chain wear. As the chain’s pins and bushings wear, the pitch effectively lengthens. A worn chain can sit poorly on the sprocket and chainring, accelerating wear on both.
Use a proper chain-wear indicator and follow the chain manufacturer’s replacement guidance. Park Tool gives 1.0% as a general replacement guideline for single-speed chains, while also noting that manufacturer specifications should take priority. If a new chain skips on an old sprocket, the sprocket may already be too worn to mesh correctly.
Clean and lubricate the chain at an interval appropriate to your weather and mileage. Wipe off excess lubricant, since a heavily coated chain attracts grit. A clean drivetrain also makes it easier to spot stiff links, corrosion, cracked plates, and damaged teeth.
Problems that look like incorrect tension
Poor chainline: viewed from behind, the chainring and rear sprocket should be aligned. A sideways-running chain may be noisy and more likely to derail even when tension feels correct.
A stiff link: turn the cranks slowly and watch each link as it leaves the rear sprocket. A link that does not articulate freely can jump or click once per revolution.
Worn or damaged teeth: hooked, bent, or uneven teeth will not be repaired by adding tension. Inspect both the chainring and rear sprocket.
A loose chainring or sprocket: check all mounting hardware to the component manufacturer’s instructions. Movement at the mounting interface can create changing tension and unsafe operation.
An off-centre wheel: pulling one side of the axle farther back may make the chain feel right but leave the tyre misaligned. Tension and wheel alignment must be solved together.
A safe final check before riding
- Turn the cranks through several complete revolutions.
- Confirm that the chain has movement at its tightest point and never binds.
- Check that the rear wheel is centred and spins freely.
- Verify that axle nuts or the thru-axle are tightened to the specified torque.
- Confirm that any brake hardware disturbed during adjustment is secure and correctly aligned.
- Apply a gentle sideways load at the midpoint of the chain. It may rattle, but it should remain engaged.
- Take a short, low-speed test ride in a safe area, then inspect the axle position and tension again.
If you cannot keep the wheel aligned, the axle slips under load, the chain binds, or the chain will not stay engaged, stop and have a qualified bicycle mechanic inspect the bike. Single speed chain tension cannot compensate for loose axle hardware or damaged drivetrain parts.
Plan the tensioning system before you buy parts
Single speed chain tension is a system question, not just a final workshop adjustment. The frame’s dropouts, rear axle, hub type, brake system, chain width, chainring, and sprocket all affect the available solution. Our complete single-speed build guide puts those choices in order, while the gear ratio guide helps you choose tooth counts for your terrain and riding style.
When you are ready to turn those decisions into a compatible setup, use the Bike Builder to plan the build before ordering components.
Technical references
- Park Tool: Chain Replacement, Single Speed Bikes
- Park Tool: When to Replace a Worn Chain
- Surly Bikes: Singleator specifications and limitations
- Surly Bikes: Snuggnut chain tensioning device
Always follow the instructions and torque specifications supplied by the manufacturers of your frame, hub, axle, chain, and tensioning hardware.